Mostrando entradas con la etiqueta acuarela. Mostrar todas las entradas

lunes, 3 de julio de 2017

Una tarjeta CAS para el reto de julio de La Pareja Creativa - A Clean and Simple card for LPC's July challenge

El mes de junio ha pasado volando y ya toca nuevo reto mensual en el blog de La Pareja Creativa... Esta vez os pedimos un proyecto "clean and simple". ¿Qué es el CAS? Pues un estilo limpio, con mucho espacio vacío y pocos adornos. Como esta tarjeta que le he hecho a mi maridito por nuestro 13º aniversario, ¡que es hoy!: 
The month of June just flew by and it's time for a new challenge at La Pareja Creativa. This time we ask for a clean and simple project. For those of you who don't understand the meaning of CAS, it's a clean style with a lot of empty space and very few embellishments. Like this card that I made for my hubby for our thirteenth Wedding Anniversary, which happens to be today!


Usé los troqueles "Feliz" del set Feliz Navidad Banderín y "aniversario" del set Ocasiones Felices para troquelar el mensaje en papel de acuarela de alto gramaje. 
I used dies from this and this set to die cut the sentiment out of heavy-weight water color paper.


Para el efecto de falso embossing troquelé los Corazones de Acuarela del mismo papel y los adherí a la tira con la palabra aniversario.
To create the faux embossing, I die cut several hearts from this set out of the same paper and adhered them to the strip with the word "anniversary".


Podría haber añadido algún enamel o gotitas de Glossy Accents en la zona azul, pero me gustaba la tarjeta así de sencilla... Voy a echar un vistazo a los proyectos de mis compis y os invito a seguirme, haciendo clic AQUÍ. Feliz lunes! 
I could have added a few enamel drops or some Glossy Accents droplets and still keep the card CAS, but I decided to go with a less-is-more approach. I'm going to check out the projects of my DT colleagues and invite you to do the same by clicking HERE. Have a great Monday! 

viernes, 1 de abril de 2016

LO primaveral para La Pareja Creativa

Ya estoy de vuelta con otra entrada, esta vez para hablaros del reto de abril de La pareja creativa. Este mes debéis de inspiraros en un cuadro, que os mostraré enseguida, para crear un proyecto libre. Yo decidí hacer un layout muy primaveral usando varios de los nuevos productos de LPC:


Éste es el cuadro en cuestión, es de Claude Monet y se titula "Campo de amapolas". No os asustéis, no vamos a pediros que lo copiéis... podéis inspiraros en la gama de colores, en la temática, en el estilo...


Las chicas del DT hemos usado el stencil "Amapolas", que al tratarse del producto del mes, tiene un buen descuento en la tienda de LPC. 


Vamos entonces con el proceso.... Empecé pintado el fondo con un poco de tinta Distress Tumbled glass y mucha agua... quería que fuese muy suave. Una vez seco, entinté las amapolas con dos tonos rojos de Distress Ink (Barn door y Candied apple) y el tallo con dos verdes (Shabby shutters y Peeled paint). Después dibujé el contorno de las flores a través  del stencil y las rocié con agua para darles un aspecto más imperfecto...

Por último, salpiqué todo con unas gotas de tinta china negra y ya tenía preparado mi fondo.


Tenía clara la foto que usaría, aunque fue sacada hace ya siete años, y le cree un marco con uno de los troqueles del set "Cuadrados románticos", un precioso papel de la colección "Beachside" de Lawn Fawn y un poco de cinta acolchada de doble cara.


Corté las hojas del set de troqueles "Decora con flores" en diferentes cartulinas verdes y las adherí alrededor del marco... ¡me encanta cómo quedan!

Los dos corazones son del set "Etiqueta decorada" y los corté de papel de purpurina "Marquee Love" de Heidi Swapp.


El título del layout (mi hija se llama Iris) es una mezcla de stickers, letras troqueladas y un sello del set "Frases de bebé". Por supuesto que tenía que decorarla con el precioso lazo del set "Florero y lazo" ^_^ Por último, un par de banderines en la esquina superior izquierda y ya está, un LO primaveral sencillo pero vistoso.


Haz clic en la imagen del reto para visitar el blog de La Pareja Creativa y ver las maravillosas interpretaciones de mis compis...


Con estas dos entradas seguidas, creo que descansaré del blog durante el fin de semana... ¡Pasadlo bien y hasta el lunes!

jueves, 24 de marzo de 2016

Tarjeta con acuarela para Waffle Flower - A card featuring watercolour for Waffle Flower

Como sabéis, me encanta el estilo y la calidad de los sellos y troqueles de la marca Waffle Flower. Para su reto mensual de marzo, nos proponen usar acuarelas y además, como siempre, nos dan una foto y un boceto para inspirarnos. He hecho esta sencilla tarjeta con papel de acuarela y tintas Distress...
As you know, I love the style and quality of the Waffle Flower stamps and dies. The technique for their March challenge is watercolours and as always, they give us a picture and a sketch for inspiration. I made this simple card with watercolour paper and Distress inks...  


Me encanta la combinación acuarela+oro así que decoré cada círculo con una forma troquelada en cartulina dorada.
I love the combination of watercolour+gold so I decorated each circle with a golden die cut shape.


El mini lazo, el bocadillo y la palabra "love" son de Waffle Flower. En realidad el sentimiento completo es "With love" pero con dos cortes, se pueden separar las palabras fácilmente...
The Tiny Twine Bow, the Tiny Word Bubble and the word "love" are by Waffle Flower. Actually the complete sentiment is "With love", but with two snips, you can separate the words easily... 


Para crear el fondo, dividí el papel de acuarela -troquelado con los nuevos Cuadrados cosidos de La Pareja Creativa- en nueve trozos y estampé el sello de la colección Flower circles de Waffle Flower con tinta Archival Ink negra, Después pinté los círculos con un pincel y tinta Distress y rocié todo con bastante agua...
To create the background, I divided the watercolour paper, cut with the stiched square die from LPC, into nine segments and stamped the round grid shape from the Flower circles collection with Black Archival ink. Then I painted the circles with a paint brush and Distress inks and misted everything with plenty of water...

Aquí tenéis la foto y el boceto de inspiración por si os apetece usarlos:
Here is the inspiration picture and sketch if you want to use them:


El reto se acaba el sábado por la mañana, así que tendréis que daros prisa. Pinchad en la imagen para visitar el blog de Waffle Flower:
The challenge ends on the 25th at midnight, so you have to hurry up. Click on the image to visit the Waffle Flower blog:  


Mañana volveré con otra tarjeta... ¡Hasta entonces! ^_^
Tomorrow I'll be back with another card... Until then! ^_^


miércoles, 25 de noviembre de 2015

Otra tarjeta de monos - Another monkey card

El otro día estrené un precioso set de sellos de Waffle flower e hice esta tarjeta shaker. Me quedé con ganas de más, así que inspirándome en el sketch del reto de noviembre de la misma marca hice esta segunda tarjeta:
The other day I used a beautiful stamp set by Waffle Flower for the first time and made this shaker card. I wanted to work with the stamps some more, so I drew inspiration from the november challenge sketch by the same brand to make a second card:


Fui bastante fiel al sketch aunque cambié los círculos por troquelados parciales de los tres monos... qué simpáticos son! 
I was quite true to the sketch although I changed the circles for three partially die cut monkeys... Aren't they fun?

Para el fondo estampé las piñas y plátanos del mismo set de sellos, "Willie and friends" sobre papel de acuarela con tinta muy clara para conseguir un efecto natural (sin contorno) y los coloree con rotuladores Copic. Después los cubrí con papel de enmascarar y trabajé el fondo con tintas Distress y la técnica de "Ink smooshing". 
For the background I stamped the pineapples and bananas from the same set "Willie and friends" on watercolour paper with light ink in order to achieve a natural looking no-outline colouring with Copic markers. Then I covered them with masking paper and worked on the background with Distress inks and the "ink smooshing" technique.


Para que no resaltase demasiado, lo cubrí con un bonito trozo de vellum con triangulitos dorados de la colección "Wonder" de Crate Paper.
So that it wouldn't stand out too much, I covered it with a piece of beautiful vellum with gold triangles from Crate Paper's "Wonder" collection.

Es difícil mostrar el brillo en una fotografía... aquí se aprecia un poco mejor:
It's difficult to capture the shine in a picture... here you can see it a little bit better:


La tira de washi tape también lleva dorado y me gusta el toque elegante que le da a la tarjeta...
The strip of washitape also has gold in it and I love the touch of elegance that it gives the card...


También usé máscaras para estampar los complementos de los monitos, que coloreé con rotuladores Copic y adorné con un par de enamel dots.
I also used masks to stamp the accessories of the monkeys, which I coloured with Copic markers and embellished with a couple of enamel dots.


Este mono en concreto tiene una cara bastante enigmática... ¿que le estará pasando por la cabeza? Seguramente estará pensando en plátanos, je je ^_^
This monkey has such an enigmatic face... I wonder what it's thinking about... probably about bananas, ha ha ^_^


Esta mona tiene unos ojos muy expresivos como los dibujos japoneses... los cubrí con una capa de Glossy Accents para darles volumen y brillo. El sentimiento es de un set de sellos de Mama Elephant embosado en blanco sobre un bocadillo de madera, previamente entintado con tinta negra.
This monkey has really expressive eyes, like a Japanese cartoon character... I covered them with a layer of Glossy Accents to give them volume and shine. The sentiment is from a stamp set by Mama Elephant which I embossed on a previously inked wood veneer speech bubble. 

Con esta tarjeta también participo en el reto "Hoy jugamos al 3 en raya" de Locas por el Scrap eligiendo la combinación: sellos, acuarelas y vellum de la siguiente tabla:
With this card I also participate in the tic-tac-toe challenge at Locas por el Scrap with the combination: stamps, watercolour and vellum. 


Gracias por llegar hasta aquí! Pronto estaré de vuelta con otro proyecto...¡feliz miércoles!
Thanks for reading until the end! I'll be back soon with another project... happy Wednesday!


domingo, 15 de noviembre de 2015

Una shaker muy "mona" - A shaker card with a bunch of monkeys

Hace una semana que he vuelto de mis vacaciones y no he podido publicar nada hasta hoy... Tenía muchas ganas de participar en el reto de tarjetas de Yoy Scrap en el que nos pedían animales y acuarelas y lo hago a última hora estrenando un precioso set de sellos de Waffle Flower; "Willie and friends".
I came back from my vacation a week ago and I haven't been able to post anything until today... I very much wanted to participate in Yoy Scrap's card challenge (it ends today!) in which they asked us to use watercolours and animals and I'm doing so with a brand new set of stamps from Waffle Flower; "Willie and friends". 


Para el fondo he estampado las piñas y los plátanos con Archival Ink de Ranger sobre papel de acuarela y después los he coloreado con rotuladores acuarelables Tombow Dual Brush Pens. Después he pulverizado un poco de agua sobre las imágenes para conseguir un efecto de acuarela...
For the background I stamped the pineapples and bananas with Ranger's Black Archival Ink on watercolour paper and coloured them with Tombow Dual Brush Pens. Then I spritzed some water on the images to get a fun, messy effect...

  
Una vez secos, los he enmascarado para no perder el color de las frutas y he trabajo el fondo con tintas Distress azules y verdes y la técnica de "ink smooshing" (básicamente se trata de estampar con tintas, agua y acetato). ¡Me gusta mucho el resultado!
Once they were dry I masked them off so as not to lose their colour and worked the background with blue and green Distress inks and the "ink smooshing" technique (it's basically just stamping with inks, water and acetate) I love the result!


He creado el elemento shaker con un troquel de marco polaroid de Lawn Fawn, pero en lugar de usar goma eva, lo he montado con varias capas de papel de acuarela... me resulta más fácil y robusto cuando se trata de una forma tan delicada...
I made the shaker element with a polaroid die by Lawn Fawn, but instead of using fun foam, I created it with layers of watercolour paper... it was easier and the result is much sturdier when working with such a fragile shape.

He estampado la pareja de monos con tinta Memento Black Tuxedo y los he coloreado con Copics, después los he recortado y pegado encima del marco...
I stamped the two monkeys with Memento Black Tuxedo ink and coloured them with Copics, then I fussy cut them and attached them to the frame...


Sus hijitos están estampados sobre plástico retráctil semitransparente (frosted), coloreados por detrás y recortados a mano... he usado máscaras para estampar los que llevan lazo y chupetes.
I stamped the baby monkeys on frosted shrink plastic, coloured the back side and fussy cut them... I used masks to stamp the ones with dummies (pacifiers) and bows.

He embosado el mensaje en blanco sobre cartulina negra y lo he recortado a mano. "Thanks a bunch" significa muchas gracias, pero la palabra "bunch" también significa racimo, manojo o grupo de cosas o gente...
I embossed the sentiment in white on black cardstock and fussy cut it. You English-speakers know the different meanings of the word "bunch", but I have explained it in Spanish... 


Con esta tarjeta también participo en el reto de noviembre de Waffle Flower... acabo de descubrir esta marca y me he enamorado! Este mes nos piden que usemos la técnica del enmascarado y al menos uno de sus productos para crear un proyecto libre. 
With this card I also participate in Waffle Flower's November Challenge... I've just discovered this brand and I've fallen in love! This month they want us to make a project using masking and at least one of their products. 


También nos dan una paletas de colores y un sketch para inspirarnos, aunque no es obligatorio usarlos.
They also give us a colour palette and sketch to inspire us although we don't have to use them if we don't want to.

wfc-201511-photo    wfc-201511-sketche

Podemos participar las veces que queramos y ya tengo otra tarjeta de monos en mente ^_^  así que ¡hasta pronto!
We can participate as many times as we like and I've already thought of another monkey card ^_^ so, see you soon!

lunes, 31 de agosto de 2015

Layout veraniego - A summer-time layout

Una rapídisima entrada para mostraros un layout que hice para participar en el reto de agosto de Kimidori: "¡Al agua patos!". Como todavía no he impreso fotos de este verano y tenía pendiente scrapear unas de nuestra boda y luna de miel (en Xcaret, México), he tirado de archivo...
A very quick blog entry to show you a layout that I made to participate in the August challenge at Kimidori: "Jump right in!". Since I haven't yet printed the pictures of this ongoing summer and I still haven't started scrapbooking the ones from our wedding and honeymoon (in Xcaret, Mexico) I picked a couple of the latter...


Había que hacer un proyecto relacionado con el agua y como el turquesa es uno de mis colores favoritos, creé un fondo con tintas Distress (Tumbled glass, Broken china y Peacock feathers) y un toque de Perfect pearls, para darle un poco de brillo, usando la técnica de "Ink smooshing".
The challenge was water-themed and since turquoise is one of my favourite colours, I created a background with Distress inks (Tumbled glass, Broken china and Peacock feathers) and a touch of Perfect pearls, for some shine, using the "Ink smooshing" technique.


Utilicé un par de maderitas, stickers y formas troqueladas para adornar este layout bastante sencillito...
I used a couple of wood veneers, stickers and die-cuts to embellish this quite simple layout...


El adorno principal del layout, es esta etiqueta que fue creada con troqueles y sellos de La Pareja Creativa. En mi línea de exprimir al máximo los troqueles, usé el troquel de hilo del "Set de costura" para cortar las ondas. En ESTA entrada os muestro otras maneras de aprovecharlos.
The main embellishment of the LO is this tag, that was made using dies and stamps by La Pareja Creativa. In order to make the most of  my dies, as I usually do, I used the thread die from the Sewing kit to cut the waves. In THIS entry, I show you other ways to take advantage of your dies.


Me apetecía usar unas "thickers" para el título, pero como no tenía unas adecuadas, pegué tres capas superpuestas de papel de acuarela y las corté con el troquel Bigz XL "Wordplay" diseñado por Tim Holtz para Sizzix. Me encanta el resultado... las letras tienen mucho volumen sin ser demasiado llamativas.
I felt like using thickers for the title, but since I didn't have any, I glued three layers of watercolour paper on top of each other and cut them with the Bigz XL die "Wordplay" designed by Tim Holtz for Sizzix. I love the result... the letters have a lot of volume without drawing too much attention.


Me despido con un último vistazo al layout... Hoy os vais a cansar de mí hoy porque tengo otra entrada programada para las once... ¡Hasta muy pronto!
Here's one more look at the whole layout... Today you will grow tired of me because I have another entry programmed for eleven o'clock... See you very soon!

miércoles, 1 de julio de 2015

Otra tarjeta con falsa acuarela para el reto de 3flowers - Another card with faux watercolour for the challenge at 3flowers

Ya estoy de vuelta con la segunda tarjeta que presento para el reto de "falsa acuarela" de 3flowers. Esta vez he creado una tarjeta muy sencilla y alegre coloreando un sello de topitos de Hero Arts con tintas Distress en varios colores y estampándolo sobre un trozo de papel de acuarela humedecido. 
I'm back with my second card for the faux watercolor card challenge at 3flowers. This time I've made a simple card with a dotted background stamp by Hero Arts coloured with Distress inks and stamped on humid watercolour paper.


Me encanta el efecto difuminado e imperfecto que se consigue con esta técnica... Busqué un elemento alargado para colocar en uno de los laterales y encontré, en mi querida caja de restos de proyectos, este busto de costura cortado con un troquel de Die-namics.
I love the soft and imperfect effect that you achieve with this technique... I searched for a tall element to place on one of the sides and chose the seamstress mannequin, cut with a Die-namics die, from my beloved box of project leftovers.


Como quedaba un poco soso, lo decoré con un corazón de cartulina rosa con una capa de Glossy Accents y un lacito turquesa clarito (un troquel de Mama Elephant) cubierto con Wink of Stella transparente...
Since it looked too dull, I decorated it with a pink paper heart glazed with a layer of Glossy Accents and a light turquoise mini bow (a die from Mama Elephant) covered with clear Wink of Stella...


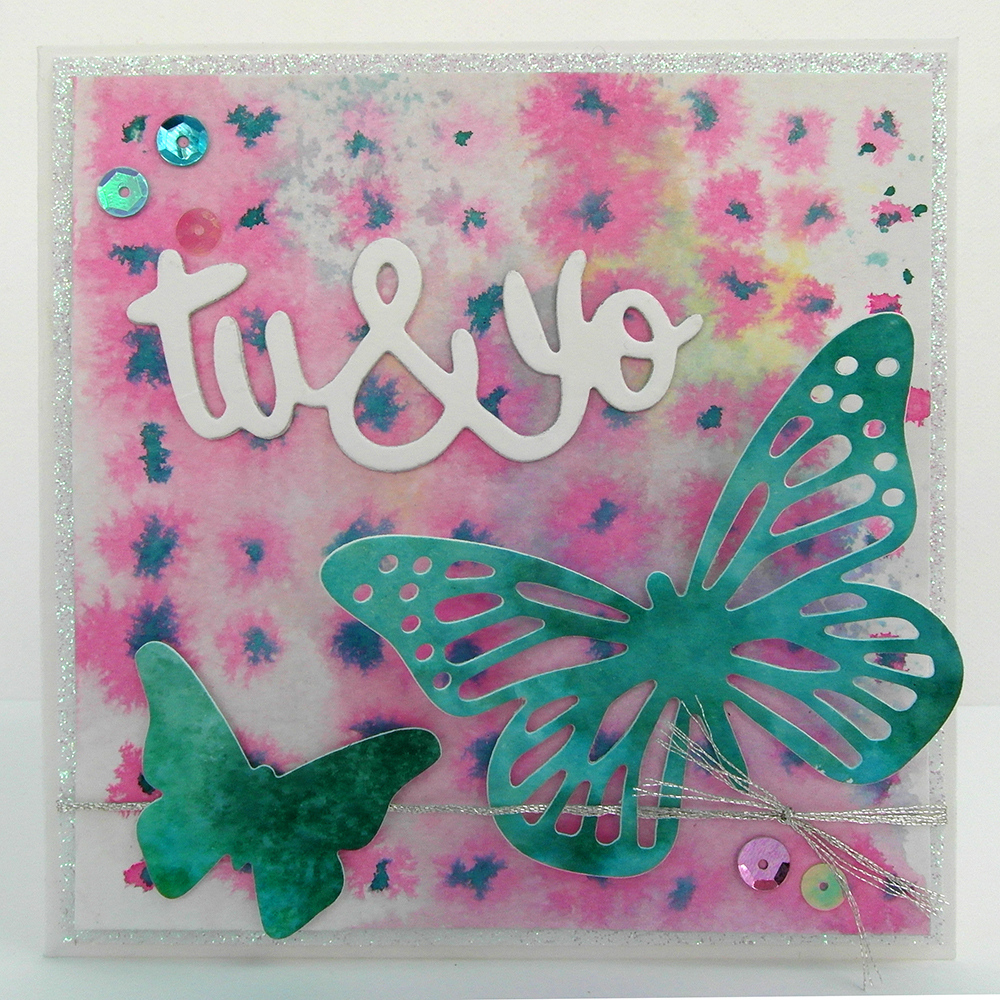
Las amigas de mi madre en Finlandia siempre me están encargando tarjetas para regalar así que añadí la palabra "TACK" (gracias en sueco) en un banderín de papel vegetal. Troquelé las letras de un trozo de papel de acuarela que me había sobrado y las cubrí con Glossy Accents para darles brillo y volumen.
My mother's friends in Finland are always asking me for greeting cards, so I added the word "TACK" (Swedish for "thanks") on a vellum banner. I die cut the letters from a piece of leftover watercolour paper and covered them with Glossy Accents to give them some shine and volume.


Por último añadí unos enamel dots y un falso cosido dibujado a mano alrededor del borde y ya está.
Lastly I added some enamel dots and hand drawn faux stiching along the edge and that's it... finished!

Aquí tenéis la segunda tarjeta con la que NO participo en el reto de 3flowers aunque me gusta bastante...
Here's the second card that I'm NOT entering in the 3flowers challenge although I like it a lot...


Para las plumas, cortadas con troqueles de Die-namics, utilicé cartulina lisa de alto gramaje que coloree con tintas Distress y bastante agua. Quedó super colorido, verdad? Por eso decidí usar un pequeño fragmento y no toda la hoja. 
For the feathers, cut with a die from Die-namics, I used heavy-duty card stock coloured with Distress inks and a lot of water. It turned out almost too colourful, didn't it? That's why I decided to use only a small piece and not the whole sheet.


Usé una serie de sellos y letras troqueladas para escribir el sentimiento: "Tu sonrisa es de las pequeñas cosas que me hacen feliz cada día".
I used a series of stamps and die cut letters to spell out the sentiment: Your smile is one of those small things that make me happy every day".


Por último os dejo fotos de las cuatro tarjetas de "falsa acuarela" que hice:
Lastly here's a picture of the four cards that I made using "faux watercolour":


Me encantaría que me dejarais un comentario diciendo cuál os gusta más ^_^ ¡Hasta la próxima!
I would love it if you could leave me a comment telling me which one you like the most ^_^. See you next time! 

lunes, 29 de junio de 2015

Tarjeta con falsa acuarela para el último reto de la temporada de 3flowers - A card with faux watercolour for the last challenge of the season at 3flowers

Se acaba la temporada en uno de los mejores blogs de retos de tarjetas que conozco. En estos ocho meses (abrí mi blog en octubre y concursé por primera vez en noviembre con ESTA tarjeta), he aprendido un montón... tanto de las florecillas: Andrea, Cristina, Yolanda, Cris, Mariola, Rocío y Susana como de las DT de honor fijas: Manoli y Kristina, las DT de honor invitadas y las participantes.
The season is ending at one of the best card challenge blogs that I know. During these last eight months (I started my blog in October and participated for the first time in November, with THIS card), I've learned so much... both from the "flowers": Andrea, Cristina, Yolanda, Cris, Mariola, Rocío and Susana as from the Honorable DT members: Manoli and Kristina, the Guest DT members and participants.

Para su último reto de la temporada (el número 52), la maravillosa DT invitada Ana Manzana, del blog Papel de Manzana, nos invita a crear una tarjeta usando "falsa acuarela". Esto quiere decir; tintas Distress, gelattos, lápices acuarelables...todo menos acuarelas "de verdad".
For the last challenge of the season (number 52), the wonderful guest DT member Ana Manzana from the blog Papel de Manzana, invites us to make a card using "faux watercolour". In other words, Distress inks, gelattos, watercolor pencils...amything but real watercolours.

Me ha encantado el tema propuesto por Ana y he creado nada menos que cuatro tarjetas (os enseñaré todas, pero sólo presentaré dos de ellas al reto)... aquí tenéis la primera: 
I love the theme suggested by Ana and have created a total of four cards (I will show them all, but will only submit two of them to the challenge)... here's the first one:


Quise crear una tarjeta con tres flores, así que estrené un maravilloso troquel de X-cut que compré hace un par de semanas. Corté las rosas de papel de acuarela y las coloree con mis queridas tintas Distress y mucha agua. 
I wanted to make a card with three flowers, so I used this wonderful die by X-cut, that I bought a couple of weeks ago, for the very first time. I die cut the roses from watercolour paper and coloured them with Distress Inks and a lot of water.


Usé los tonos Tattered rose, Spun sugar y Pickled raspberry para las flores y Peeled paint y Pine needles para las hojas. 
I used the tones Tattered rose, Spun sugar and Pickled raspberry for the flowers and Peeled paint and Pine needles for the leaves.


El fondo también fue creado con tintas Distress y además de los tonos que ya he mencionado, usé Mustard seed (un amarillo muy bonito) y Dried marigold (un naranja clarito)
I also created the background using Distress inks. Besides the tones already mentioned, I used Mustard seed (a lovely yellow) and Dried marigold (a light orange).

Para que las flores resaltaran del fondo, troquelé un trozo de cartulina negra y lo pegué un pelín descentrado (hacia la derecha) debajo del die-cut coloreado... me gusta mucho el resultado.
So that the flowers would stand out from the background, I die cut a piece of black cardstock and glued it a little bit off centre (to the right) underneath the coloured die-cut... I love the result.

Pegué el panel de tarjeta encima de un papel de purpurina plateado y las dos cosas encima de una base de tarjeta de papel de acuarela y creo que no necesita más adornos... ¿Qué os parece? 
I glued the card panel on a piece of silver glitter paper and both elements on a watercolour paper card base. I don't think the card needs any embellishments... What do you think? 


Antes de irme, os muestro otra de las tarjetas que hice pero que no presento al reto:
Before I go, I want to show you one of the other cards that I made, but that I'm not submitting to the challenge:


También estrené troquel de Sr. Piruleta que me tocó en un sorteo de Mi Tienda de Arte en Instagram. Ahora sí que os dejo... ¡Hasta muy pronto!
I used a die by Sr. Piruleta that I won at a give away by Mi Tienda de Arte on Instagram, also for the first time. Now it's time for me to leave... See you very soon!