
Este año el dicho "en abril, aguas mil" no se está cumpliendo aquí en Galicia, ya que está siendo el abril más seco de la historia. Aún así me inspiré en el reto de Paper Smooches, "April Showers", para crearle esta divertida tarjeta cumpleañera a una querida amiga scrapera.
This year the month of April has been very dry here in Galicia, but nevertheless, I was inspired by the "April Showers" Paper Smooches challenge to create this fun, interactive Birthday card for a dear crafty friend.

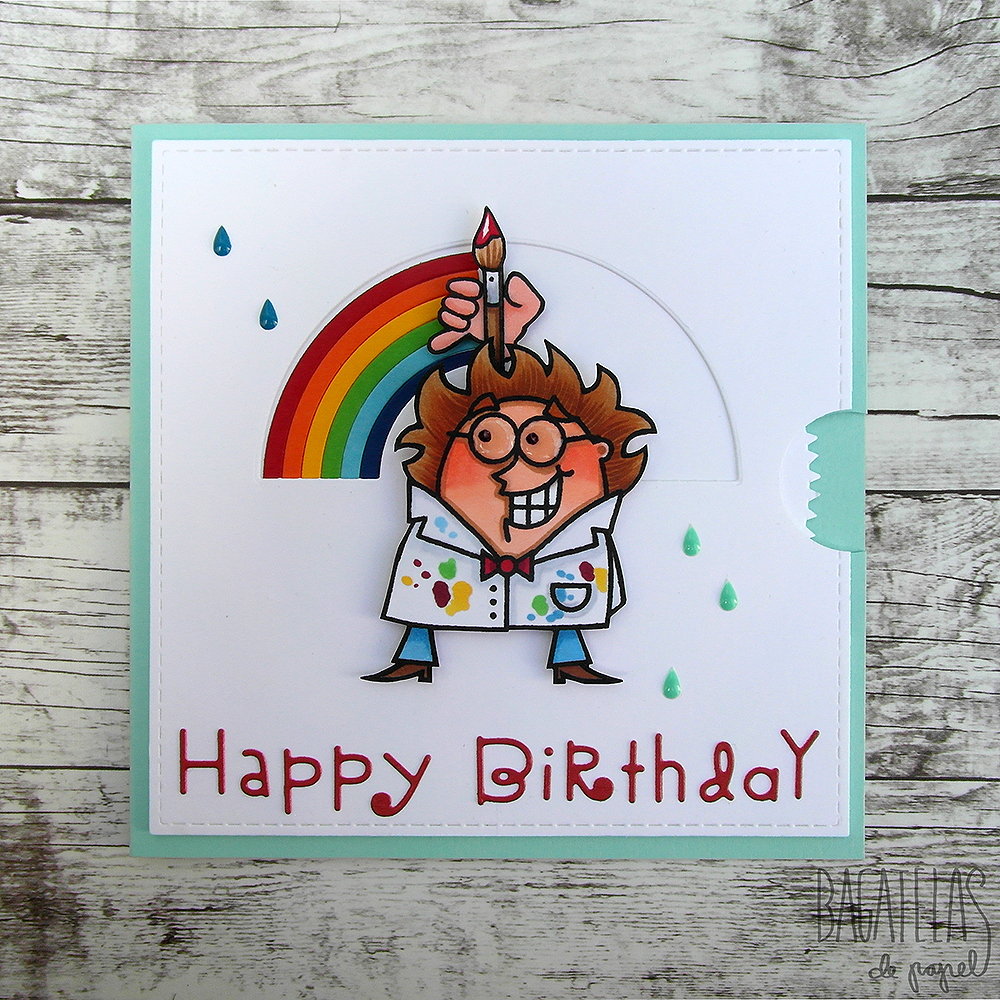
Con algo de estampación parcial, convertí el científico loco del set de sellos "Great Chemistry" en un entusiasmado pintor en pleno proceso creativo.
Thanks to some partial stamping, I transformed the crazy professor from the stamp set "Great Chemistry" into a flustered, brush-wielding painter.
En este vídeo clip podéis ver cómo se acciona la tarjeta y descubrir qué es lo que está pintando ese artista loco...
In this video clip you can see how the card works and what our crazy artist is painting...
Ji ji ji, ¿qué os ha parecido? A pesar de que no fui capaz de alinear perfectamente el pincel con el arcoíris (no quise acortar el brazo más), me gusta mucho el efecto.... casi "da el pego" ;)
Ha ha ha, what do you think? Even though I wasn't able to perfectly align the brush with the rainbow (I didn't want to make the rotating arm any shorter), I like the effect...
Aquí tenéis la secuencia en fotos:
Here you can see the sequence in pictures:


El mecanismo es realmente sencillo... Utilicé el troquel "Rainbow", también de Paper Smooches, para troquelar una ventana en el panel y para cortar las tiras que forman el arcoíris. Tanto el brazo como el disco están sujetos con un encuadernador (brad) al panel. El brazo está adherido al disco dentado con almohadillas adhesivas de tal manera que al girarlo, los dos elementos se mueven a la par.
The mechanism is really simple. I used the "Rainbow" die, also by Paper Smooches, for cutting a window out of the card panel, and for the rainbow itself. Both the arm and the disc are attached to the card panel with a small brad. The arm is also glued to the pinked disc with foam adhesive so that they can rotate together.
The mechanism is really simple. I used the "Rainbow" die, also by Paper Smooches, for cutting a window out of the card panel, and for the rainbow itself. Both the arm and the disc are attached to the card panel with a small brad. The arm is also glued to the pinked disc with foam adhesive so that they can rotate together.

El divertido personaje, coloreado con rotuladores Copic, está pegado con almohadillas adhesivas aunque no lleva ninguna detrás de la cabeza para que el brazo pueda girar libremente.
The fun character, colored with Copic markers, is glued to the card panel with foam adhesive. I didn't put any behind his head so that the arm can rotate freely.

Eso es todo por hoy. Aquí tenéis de nuevo el enlace al reto. Todavía os quedan unos días para participar, así que ¡adelante!
That's all for today. Here's the link to the challenge once more. You still have a couple of days to participate, so go for it!
The fun character, colored with Copic markers, is glued to the card panel with foam adhesive. I didn't put any behind his head so that the arm can rotate freely.
Eso es todo por hoy. Aquí tenéis de nuevo el enlace al reto. Todavía os quedan unos días para participar, así que ¡adelante!
That's all for today. Here's the link to the challenge once more. You still have a couple of days to participate, so go for it!


